| Refstat for Windows -
User Instructions Contents
- Introduction
- Refstat licence agreement and copyright notice
- Downloading the program through Internet
- Program installation
- Starting the program
- Data import
Any remaining questions?  Send us e-mail! Send us e-mail!
Introduction
Refstat for Windows is a program for verification of reference limits. The small
locally produced validation values are compared to the set of reference values produced
elsewhere. Refstat applies the computing intensive Monte Carlo sampling technique.
Based on these calculations it can be decided whether the "borrowed" reference
limits are locally applicable or not.
The program includes the following features:
- Microsoft Windows commands and user interface
- rapid import of source data as a simple text(ASCII)file containing all original
observations
-
Full advantage of all features in Refstat for Windows will be achieved if the program
is used together with other programs running under Microsoft Windows. Data import and
export, graph export, and switching from one program to another allow convenient use of
Refstat together with other Windows applications.
REFSTAT
LICENCE AGREEMENT
Refstat for Windows software product is furnished subject to the terms and
conditions of this licence agreement. Starting the downloading or installation procedure
for the software will constitute acceptance of the licence terms. Refstat is available for
a trial period of one month free of charge. If the software licence is not purchased after
this trial period, the program and any possible copies of it should be deleted/destroyed.
You may not disassemble, decompile or reverse engineer Refstat in any way. Refstat
software is available both for individual and institutional use. The individual version
may be run only in one computer at a time, while the institutional version may be run in
up to ten computers within the same institution simultaneously. You may make copies of
Refstat for archival and back-up purposes only.
LIMITATION OF WARRANTY
The software and documentation is provided "as is" without warranty of
any kind. The developers of this software as well as anyone else who has been involved in
the creation, production, or delivery of this software disclaim all warranties relating to
this software, whether expressed or implied, including but not limited to any implied
warranties of merchantability and fitness for a particular purpose, and all such
warranties are expressly and specifically disclaimed.
EXCLUSIVE REMEDY
Your exclusive remedy arising from or in connections with the software and/or
documentation shall be, at the software producer�s option, the replacement of the
software diskette and/or the instructions booklet.
LIMITATIONS OF LIABILITY
In no event shall the developers of this software, or anyone else who has been involved in
the creation, production, or delivery of this software, be liable for any direct,
indirect, consequential or incidental damages, arising out of the use or inability to use
this software.
COPYRIGHT NOTICE
The individual version of Refstat is intended for single user only.
Installation of it to multiple computers or making it accessible through local network
violates the copyright of the software developers. The institutional version of Refstat
may be installed to a maximum of 10 computers within a specified institution and used by a
maximum of 10 simultaneous users. Copying the program for use outside the specified
institution violates the copyrights of the software developers.
Program updates in 1996 will be sent free of any additional charge to all registered
Refstat users.
Program installation
If you have downloaded Refstat through
Internet…
Starting the downloading and the installation procedure will constitute acceptance
of the licence
terms. To start the installation please create a directory/folder named DISK1 into the
root directory of your hard disk. Copy the downloaded Refstat.zip file into this
directory. Before starting the installation it is necessary to unzip the zipcompressed
file. This can be done, for example, by PKUNZIP or by any other unzipping program. After
completing the unzipping, start the installation as follows:
Windows 3.x: Start Microsoft Windows, open the FILE MANAGER, choose File
Run and select the directory /disk1, write setup and press enter.
Windows 95: Choose Start and Run, use the browse option to
select the folder /disk1 where the unzipped installation files are located and select the
file setup.exe there, press OK by your mouse pointer.
Refstat for Windows will be automatically installed to your hard disk in a subdirectory
named Refstat. The required disk space is about 800 kB. When the setup asks for your
registration number just press enter, the evaluation version of Refstat will become
installed. The evaluation version functions exactly as the fully registered version except
that it has a "time out" feature, which will disable its function after about
six weeks of installation. To assure uninterrupted use of Refstat, please place your order
for the registered version in good time, i.e., as soon as you have evaluated the software.
If you install Refstat from the installation disk…
Starting the installation procedure for the software will constitute acceptance of
the licence
terms. Put the installation diskette in the diskette
drive A: (or B: etc.) of your computer.
Windows 3.x: Start Microsoft Windows, open the FILE MANAGER, choose File Run and
write A:\setup and press enter.
Windows 95: Choose Start and Run, use the browse option to select the disk drive
and the file setup.exe there, press OK by your mouse pointer.
Refstat for Windows will be automatically installed to your hard disk in a subdirectory
named Refstat. The required disk space is about 800 kB. Please have your registration
number ready, when starting the installation. If you do not enter the registration number
during installation, the evaluation version of Refstat with "time out" feature
will become installed.
Quick reference:
Double click by mouse the Refstat icon in the Refstat program group.
The starting of Refstat is similar to that of any Windows program. The installation
procedure creates a Refstat icon and a Refstat program group. These can also be separately
created and reorganized by standard Windows procedures. Without using any icon, the
program can be started from the Windows Program Manager by selecting File
Run (in Windows 95 Start and Run command) and
writing the path and the name of the program file, for example C:\Refstat\REFER.EXE. Note,
however, that on the installation disk the files are compressed and they can not be run
before installing them.
Quick reference:
Alternative 1: To import data of all original observations, select File Open
and name the textfile containing the data
Alternative 2: To import data already grouped as a reference distribution, copy the
data first to Windows clipboard in some other Windows program, in Refstat select File
New and Data Paste.
Alternative 1: Importing source
data as original observations
Data is imported by the File Open command. Importable data files are simple
ASCII(text)files containing numerical observations in columns, one numerical observation
on each row of the column. For one distribution procedures, the source data file should
contain one column, and for two distributions procedures, the source data file should
contain two columns of observations. Health related data should be in the first column and
illness related data in the second one.
When using two column source data files, please note, that the two columns should be
separated from each other by the tab symbol. For example Microsoft ExcelTM
inserts a tab sign between the two columns automatically when saving the file in tab
delimited text-format. Such text files can be imported into Refstat without difficulty.
However, some worksheet programs, like Lotus 1-2-3TM, insert only empty spaces
between the two columns in textfiles and consequently Refstat can not recognize the two
columns as separate which will result in incorrect data input. If tab delimited files can
not be created it is advisable to import the source data as one column files and make the
necessary file combinations for two distribution analysis within Refstat.
Please check that the default for decimal separator sign (either point or comma) is the
same in your source data file and in your Windows settings. If needed, you can change the
decimal separator in the Windows Control Panel under International and Number
format. Note that the decimal separator should not be the same sign as the thousands
separator. Mismatch between the decimal separators defined in the Control Panel and used
in the source data will lead to incorrect data input.
The source data file should not contain any empty rows between observations. The default
file name extension is .SM1 (one column) or .ROC (two columns). Except for the source
data, the file may not contain any other data or text. When creating the source file for
example by a worksheet program, be sure that all the worksheet cells, except those
containing the data, are empty. Failure to follow these instructions may lead to incorrect
data input. In case of difficulty, you can check the contents of the source data file by
any text editor program. The size of the imported data set is limited only by the size of
the random access memory of the computer. In practice tens of thousands of observations
can be imported without difficulty. If the imported data has a very high numerical
precision (i.e. more than five or six significant digits), the program function will be
considerably slowed. In such cases it may be advisable to round the observations to fewer
significant digits before importing the data into Refstat. Note that the values in the
data window are always shown with two decimals and that this default can not be changed in
the Windows Control Panel. In case the original bin width in your source data is less than
0.01, the only practical way to treat the data in Refstat is to multiply each value by a
suitable multiple of 10 in order to shift the decimal separator so that there will not be
more than the maximum of two decimals.
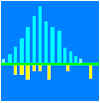
The imported data will be visible as a numerical frequency distribution in the left sided
data window and as a graph in the right sided window. The sizes of the windows can be
adjusted by the mouse. Also the widths of the columns in the data window can be adjusted
by the mouse by dragging the column borders in the title row.
Alternative 2: Importing source data as frequency distributions
Data, which is already grouped into a frequency distribution, can also be imported
from other Microsoft Windows applications via the Windows clipboard. In this case, the
data must consist of two columns. The first column includes the bins (upper class limits
of frequency distribution) and the second column the corresponding class frequencies. Note
that the data must be in two columns and that there may not be any empty cells.
The data can be transferred to clipboard, e.g. from Excel or any worksheet program, by
selecting cells in two adjacent columns and giving the Edit Copy command. To import
the data into Refstat, give first File New command and select One distribution
or Two distributions and give the Edit Paste command. When pasting data for
two distributions analysis, please note, that the data must be pasted for one distribution
at a time so that health related and sickness related data are imported separately. The
left sided first two columns should contain the frequency distribution of health related
data and the next two columns the frequency distribution of illness related data. To paste
data into correct positions select the top left corner cell of the correct columns in the
data table by clicking there the left mouse button. This should be done before giving the Edit
Paste command.
These Edit Copy data and Edit Paste commands also offer a convenient
possibility to transfer data within Refstat from one distribution analysis to two
distribution analysis. In one distribution analysis, select first the data for the
frequency distribution (the two first columns in the left-hand data table). This can be
done by putting the cursor by mouse over the top title cell of the first column and then
moving by the mouse to the title cell of the second column while keeping the left mouse
button down. This procedure will change the background colour in these two columns showing
that this data has now been selected. After this, give the Edit Copy data command,
open the two distributions analysis by the File New command, select the appropriate
column in the data table as instructed above, and give the Edit Paste command. Data
for the second distribution can be imported by repeating this procedure. Do not put the
cursor over the graph before both distributions have been imported. Putting the cursor to
the graph window-area before both distributions are available will cause an error and a
termination of the program.
Continue to next section of user instructions
|
Refstat
FEATURES
EXAMPLES
DOWNLOAD
INSTRUCTIONS
REGISTER
|